Portal App Manual
Overview
The Portal Application is a front-end interface built on the SpiderRock Connect platform. It provides access to a wide range of system messages and records, allowing users with the appropriate permissions to view, manage, and interact with data typically accessed via SRSE or MLink APIs.
All messages within the Portal are scoped by user and client firm, ensuring that sensitive data remains protected through strict access controls. This tool replaces the Control Viewer in Citrix tools for Platform V7.
Accessing the Portal
Users can access the Portal either via the web at https://spiderrockconnect.com/portal or through the installed desktop application. Access is granted once a SpiderRock Support Admin or Sponsor Firm Admin creates login credentials or enables access for an existing user. As with the entire SpiderRock Connect system, multi-factor authentication (MFA) is required for login to ensure secure access.
Navigating the Portal
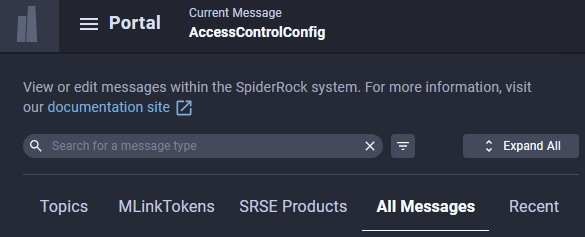
To view messages within the Portal, click the Portal Icon located in the top-left corner of the application. This action opens the Navigation Drawer, enabling users to quickly locate specific messages. Messages are organized by topic and can be accessed through the search bar or by using one of the five available categories:
- Topics
- MLinkTokens
- SRSE Products
- All Messages
- Recent
After selecting a category, users may further refine their results by conducting a keyword search. Once the desired message type is located, clicking on it will load all corresponding messages into the Results Grid below. To view the full details of a specific message, click on a record in the Results Grid. The information will be displayed in the Details Panel on the right side of the application.
For improved readability, the Autosize Columns toggle—located in the upper-right corner—is enabled by default. This feature automatically adjusts column widths based on content. By default, the Results Grid shows only a subset of available fields (columns) to optimize performance. To display all fields, users can enable the Show All Columns toggle, also found in the upper-right corner.
Note:
Showing all columns decreases speed and performance as more bandwidth is needed to deliver the full dataset to the screen.
Editing Messages
If a user has permission to edit a specific message type, the fields within the Details Panel will be editable. When a field is modified, it is highlighted with a blue outline to indicate that it has been changed but not yet saved. To apply changes, click the Save Changes button located in the bottom-right corner of the screen.
Users also have the option to:
- Reset any unsaved changes
- Duplicate the message
- Delete the message
Filtering Messages
The Portal, like MLink, is limited to displaying a maximum of 500 results in the Results Grid. To help users find specific records more efficiently, the Portal provides multiple advanced filtering systems. There are several ways to add filters listed below:
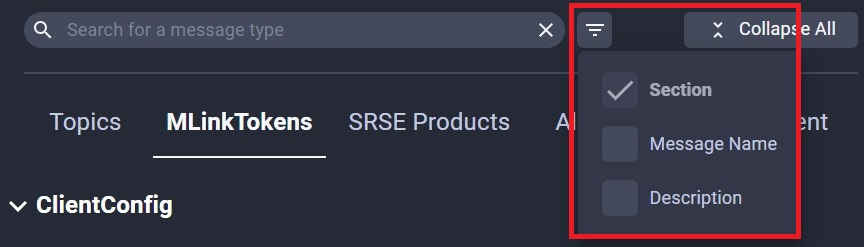
1. Navigation Drawer
The user can filter messages in the Navigation drawer by clicking the icon next to the search bar. This will open a pop-up menu with three filtering options:
- Section
- Message name
- Description
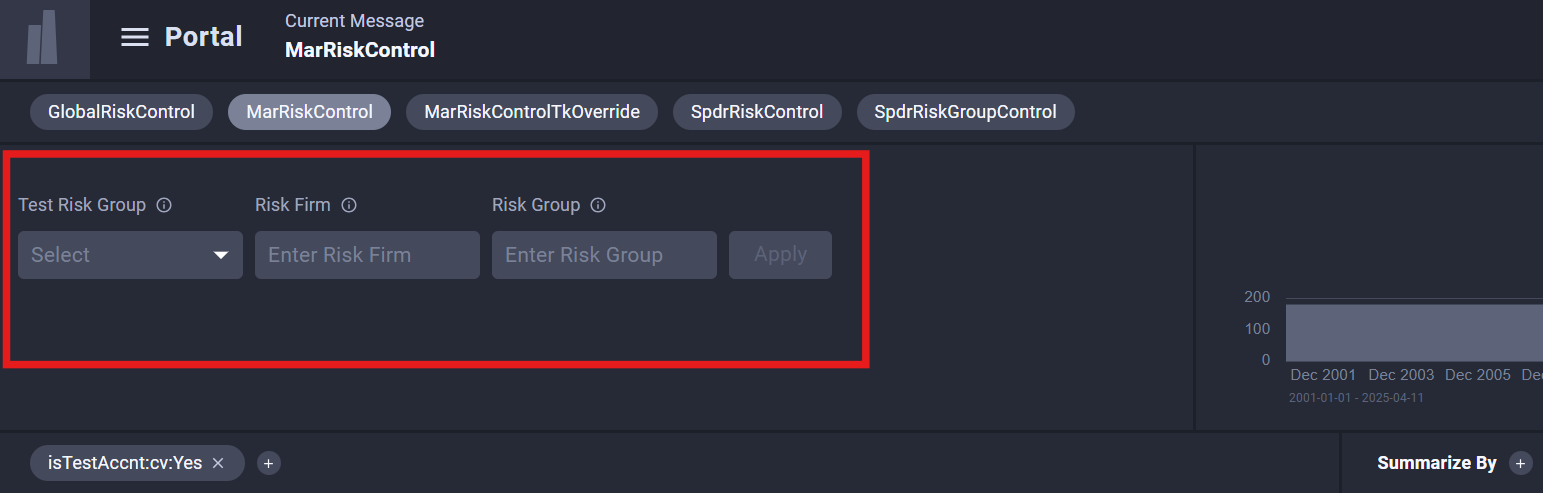
2. Query Panel
The red area in the image below is the Query Panel. It shows commonly used fields to filter on per message type. A user can either enter strings or select enums that they want to filter by. Once applied, these filters show in the below chip system where they can be edited or removed.
3. Chip Filters
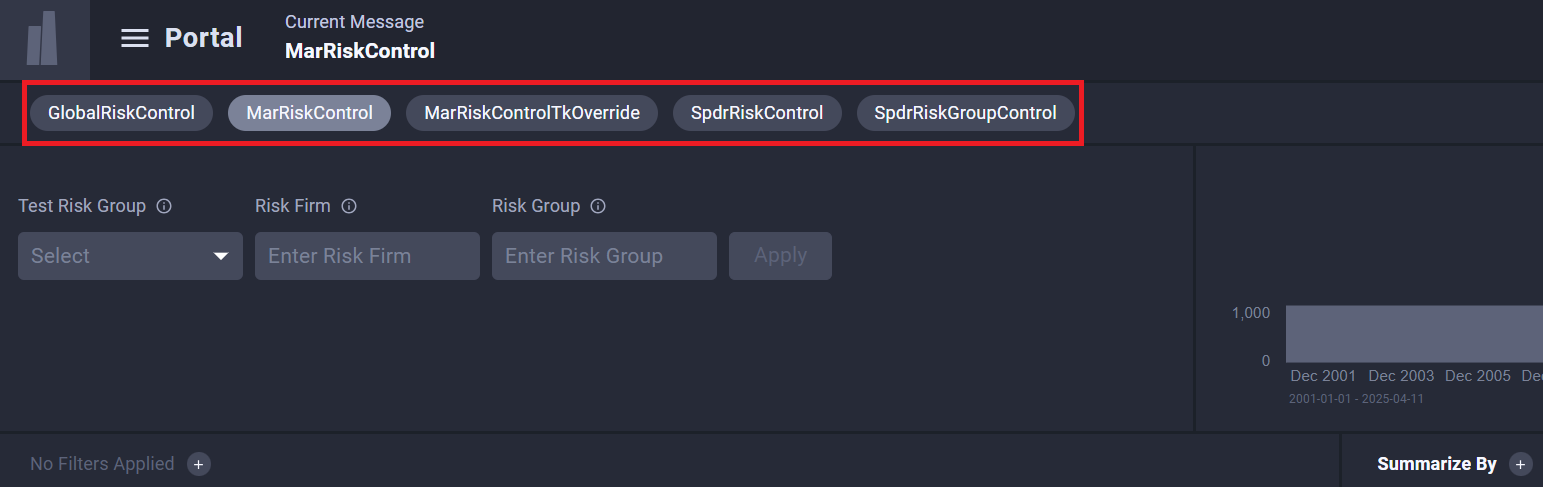
In the Portal, all message types are organized by topic. After selecting a message type from the Navigation Drawer, related message types within the same topic are displayed as interactive chips in the Chip Navigation System. This feature enhances both navigation efficiency and overall usability, allowing users to easily switch between related message types.
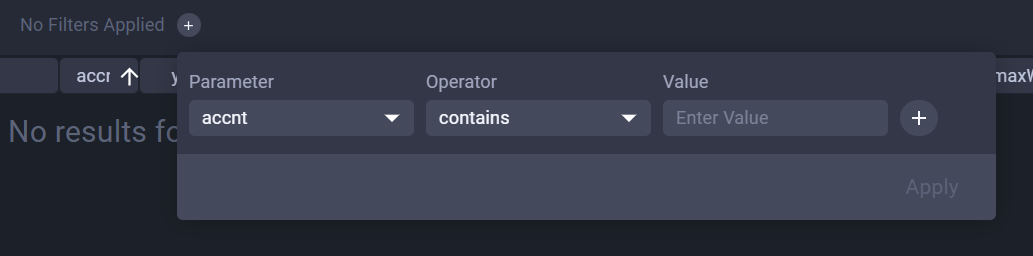
To add a filter for a field that is not visible, click the “+” button in the Chip Filter section. This opens a filter builder where users can:
- Select any parameter from the record
- Choose a comparison operator
- Enter a filter value
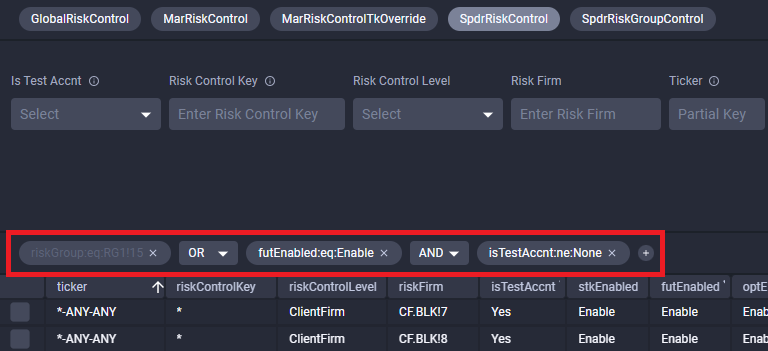
Chip filters can be edited by clicking on the chip itself, or removed by clicking the “x” on the right side of the chip. Chip filters will remain active when switching between message types within the same topic. They will appear white when they are being applied and grey when they are not. For more advanced filtering, users can build complex filters by toggling between AND and OR operators when multiple filters are applied.
4. Quick Filters
To quickly filter data, users can hover over any cell in the Results Grid to reveal a “+ / –” control on the right side of the cell.
- Clicking “+” will apply a filter to show only records where the field equals the selected cell’s value (additive filter).
- Clicking “–” will apply a filter to exclude records with the selected cell’s value (reductive filter).
This provides a fast and intuitive way to narrow down results directly from the grid.
5. Time Filters
Users can interact with the TimeStamp feature by clicking the calendar icon located on the right side of the screen. This will open a calendar selector where users can choose from a list of predefined time ranges. Users can also manually select a date or a date range by clicking the search bar next to the calendar icon. Finally, users can click on the time input field and type in the time in the format of HH:MM:SS.
Aggregated Summaries
The Portal allows users to view aggregated summaries of a message type using the Summary Grid feature.
To add a Summary Grid:
- Click the ➕ (plus) button in the Summarize Bar.
- Select one or more fields (up to three) to group and summarize data by.
Once configured, the Summary Grid will:
- Aggregate records based on the selected fields.
- Display summary data for all fields within the message type.
- Aggregation is performed over all records available within the user's access scope.
This functionality allows users to view the full dataset, rather than being constrained by the standard 500-record display limit in the Results Grid.
Note:
Summaries respect user and client firm scoping, ensuring that only authorized data is included.
Comparing Records
To compare two or more records within the Portal:
Hold Shift or Ctrl (Cmd on Mac) and click to select multiple records within the Results Grid.
Once multiple records are selected, a blue Compare button will appear at the bottom of the Results Grid. Click this button to open the Comparison Grid.
The Comparison Grid displays all fields of the selected records side by side.
- Fields with identical values are shown in gray.
- Fields with differences are displayed in white, allowing for quick visual comparison.
To return to the standard Results Grid view, click the Clear Selection button. This will exit Comparison Mode and clear any selected records.
Adding and Managing Records
To add a single record to a message type:
- Click the ➕ (plus) button in the top right of the screen to reveal a drop-down menu.
- Select "Add New Record". This will open the Details Panel with an empty form.
- Fill in the required information.
- Click the Create Record button to save the new record.
To import multiple records from a CSV file:
- Click the ➕ (plus) button and select "Import from File".
- Choose a CSV file that is properly formatted to match the message type schema.
- The Portal will automatically validate the file format.
- If errors are found, they will be displayed for the user to correct.
- Once the file is validated, confirm the import to create new records as defined in the CSV.
Note:
CSV files must follow the structure of the target message type schema in order to be imported successfully.
To export records:
- Click the menu icon in the bottom-left corner of any grid.
- Select the desired export format and proceed with the download.
Advanced Features
The Portal includes several advanced features designed for users in specialized or restricted environments:
Changing Backend Servers
In network environments without internet access, users may need to manually change the backend server source.
To do this:
- Contact your network administrator to obtain the appropriate IP address or URL for the backend server.
- In the Portal, open the User Menu by clicking on the circular profile icon in the upper-right corner of the screen.
- Use the dropdown menu under "Backend Server" to select or enter the new server address.